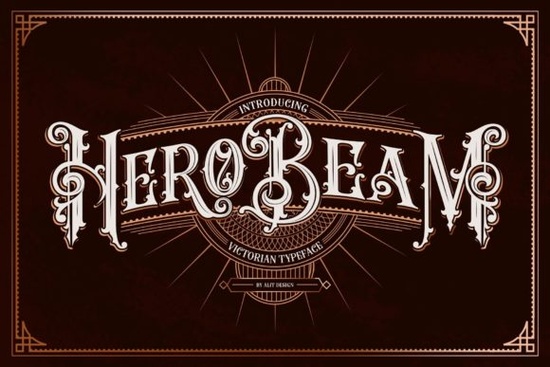
If you need a strong, vintage-inspired typeface that holds up on both screen and print, Hero Beam Font delivers exactly that. This bold blackletter design pulls from Victorian lettering traditions while keeping the lines clean enough for modern layouts. Designers, print-on-demand sellers, and crafters often look for decorative fonts that stay readable at smaller sizes, and this one strikes a practical balance between ornate details and solid structure.
What makes this blackletter typeface different?
Most heavy gothic fonts lean into sharp angles or overly complex flourishes that blur when scaled down. Hero Beam takes a slightly different approach. The letterforms are thick and confident, but the curves are smoothed out just enough to keep the text legible on t-shirts, mugs, and paper goods. Because it is fully PUA encoded, you will not need to dig through system character maps to find alternate glyphs or decorative swashes. Everything sits right inside your font menu, which saves time when you are juggling multiple client revisions or batch-producing merch designs. The consistent stroke weight also means fewer cut errors when you are running vinyl through a desktop plotter.
Which projects actually work with a heavy decorative font?
Blackletter typefaces shine when they have room to breathe. I recommend using this style for short headlines, brand marks, event posters, and packaging labels rather than long paragraphs. If you run a small shop or sell on platforms like Etsy, the bold weight prints cleanly on dark garments and stands out on sticker sheets. Crafters who work with cutting machines will also appreciate how the solid strokes reduce weeding time on heat transfer vinyl. For digital use, the font pairs nicely with simple sans-serifs or light script accents, letting the vintage character take center stage without overwhelming the layout. Keep your background textures subtle so the lettering remains the focal point.
How do I access the extra glyphs and swashes?
Since the font includes PUA encoding, you can pull up alternates directly inside most design programs. In Illustrator or Photoshop, open the Glyphs panel and scroll through the available characters. In Cricut Design Space or Silhouette Studio, you can usually access the swashes by uploading the font file and checking the character map before typing your phrase. If you are new to blackletter typography, start with the standard alphabet first, then swap in one or two decorative alternates per word. Too many flourishes in a single line can make the text feel crowded, especially on smaller products like keychains, tote bags, or phone cases. Always export a test proof at 100% scale before committing to a full production run.
What should I compare before downloading?
It helps to look at a few similar styles side by side so you can match the right mood to your project. If you prefer a more rugged, street-inspired feel, you might want to browse options like this chicano-style lettering pack for a sharper edge. For a worn, vintage motorcycle aesthetic, a classic biker typeface often delivers that distressed look straight out of the box. When you need something that leans into traditional calligraphy rules with a modern twist, a radtrad blackletter option can give you cleaner serifs and tighter spacing. And if you want to keep everything in one consistent family, the full hero beam collection includes the base files plus any bonus assets the designer has added.
You can also preview how Hero Beam Font looks across different mockups before deciding if it fits your current workflow.
Quick tips for getting the best results
Decorative fonts require a slightly different setup than everyday body text. Keep these practical steps in mind before you export your final files:
- Test your headline at actual print size to check for thin gaps or overlapping strokes.
- Use tracking or letter spacing adjustments to give heavy letters room to breathe.
- Pair the typeface with a neutral background or simple texture so the Victorian details stay sharp.
- Convert text to outlines before sending files to a print shop to avoid missing font errors.
- Save a copy of your glyph selections in a separate artboard for quick reuse on future products.
Start with a single phrase, swap in one alternate character, and print a test sheet on your target material. If the strokes hold up and the spacing feels balanced, you are ready to roll out the rest of your design set.
Learn More Radtrad Font: Creative Uses & Design Tips
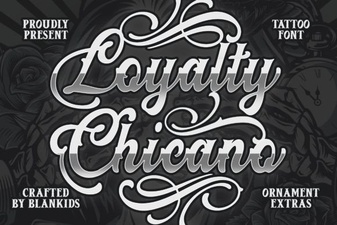 Unlock Style with Loyalty Chicano Font Designs
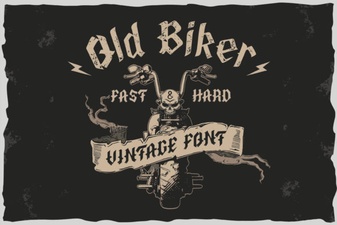 Harness the Power of Classic Biker Fonts
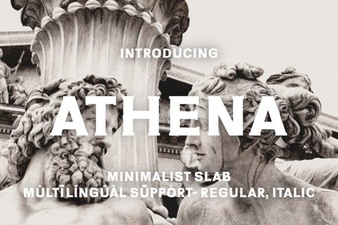 Athena Font: Elegant Typography for Modern Design
 Single Line Fonts for Creative Design & Typography
 Creative Font Pairings for Event Design